I - Using the Package Manager Console in Visual Studio
II - Finding a Package in the NuGet Package Manager Console
III - Installing a Package Using the NuGet Console
IV - Updating Packages Using the NuGet Console
V - Uninstalling a Package Using the NuGet Console
Before using the NuGet Package Manager to install, update, or remove packages, make sure you have added the appropriate package source in Visual Studio. For more information, please see this document: How to add and manage package resource
To open the Package Manager Console, go to Tools > NuGet Package Manager > Package Manager Console from the top menu.
- The console appears as a dockable Visual Studio window that you can move or resize as you prefer.
- For layout customization tips, see Customize window layouts in Visual Studio.
At the top of the console window, you'll find controls for selecting both the package source and the target project.
- These determine where commands are executed by default.
💡 Changing the selected package source or project updates the defaults for all upcoming commands. If you only want to override them for a single command, most NuGet Console commands support the
-Sourceand-ProjectNameparameters.

- To manage your package sources, click the gear (⚙️) icon next to the source selector.
- This opens the Tools > Options > NuGet Package Manager > Package Sources dialog box.
- The button beside the project selector clears the console window.

The button on the far right stops a command that's taking too long to complete.
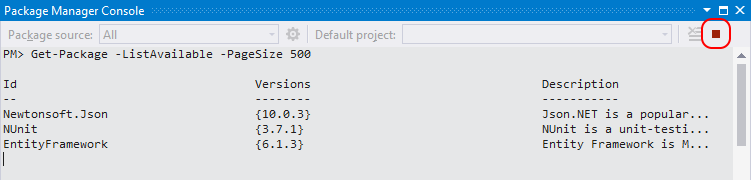
For example, running:
Get-Package -ListAvailable -PageSize 500will display the top 500 available packages from the default source (like NuGet Gallery), which may take several minutes to finish.
- To search for a package from the default source, use the
Find-Packagecommand:
Find-Package- To find and list packages that contain specific keywords, run:
Find-Package <keyword1>
Find-Package <keyword2>- To search for packages whose names start with a particular string, use the
-StartWithparameter:
Find-Package <string> -StartWith- By default,
Find-Packagedisplays up to 20 results. To show more, use the-Firstoption. For example, to list the first 100 matching packages:
Find-Package <keyword> -First 100- To view all available versions of a specific package, add the
-AllVersionsand-ExactMatchparameters:
Find-Package <PackageName> -AllVersions -ExactMatch1.To install a package into your default project, use the following command in the Package Manager Console:
Install-Package <PackageName>2.By default, the package is installed into the project currently selected as the default in the console's project dropdown.
To install it into a different project, use the -ProjectName option:
Install-Package <packageName> -ProjectName <projectName>- To check for newer versions of any installed packages, use:
Get-Package -Updates- To update a specific package to its latest available version, run:
Update-Package <PackageName>- To update all packages within a single project, specify the project name:
Update-Package -ProjectName <ProjectName>- To update every package in the entire solution, simply run:
Update-PackageVisual Studio will automatically download and apply the latest compatible versions of all referenced packages.
- To remove a package from your default project, run the following command in the Package Manager Console:
Uninstall-Package <PackageName>If you're unsure of the exact package name, use:
Get-Packageto list all packages currently installed in the default project.
- To remove a package along with all its unused dependencies, use:
Uninstall-Package <PackageName> -RemoveDependencies- To force removal of a package even if other packages depend on it, use:
Uninstall-Package <PackageName> -Force