I - How to Find and Install a NuGet Package in Visual Studio
II - How to Update a NuGet Package in Visual Studio
III - How to Uninstall a NuGet Package in Visual Studio
Before using the NuGet Package Manager to install, update, or remove packages, make sure you have added the appropriate package source in Visual Studio. For more information, please see this document: How to add and manage package resource
Open your project in Solution Explorer, then go to Project > Manage NuGet Packages.
- This will open the NuGet Package Manager window.
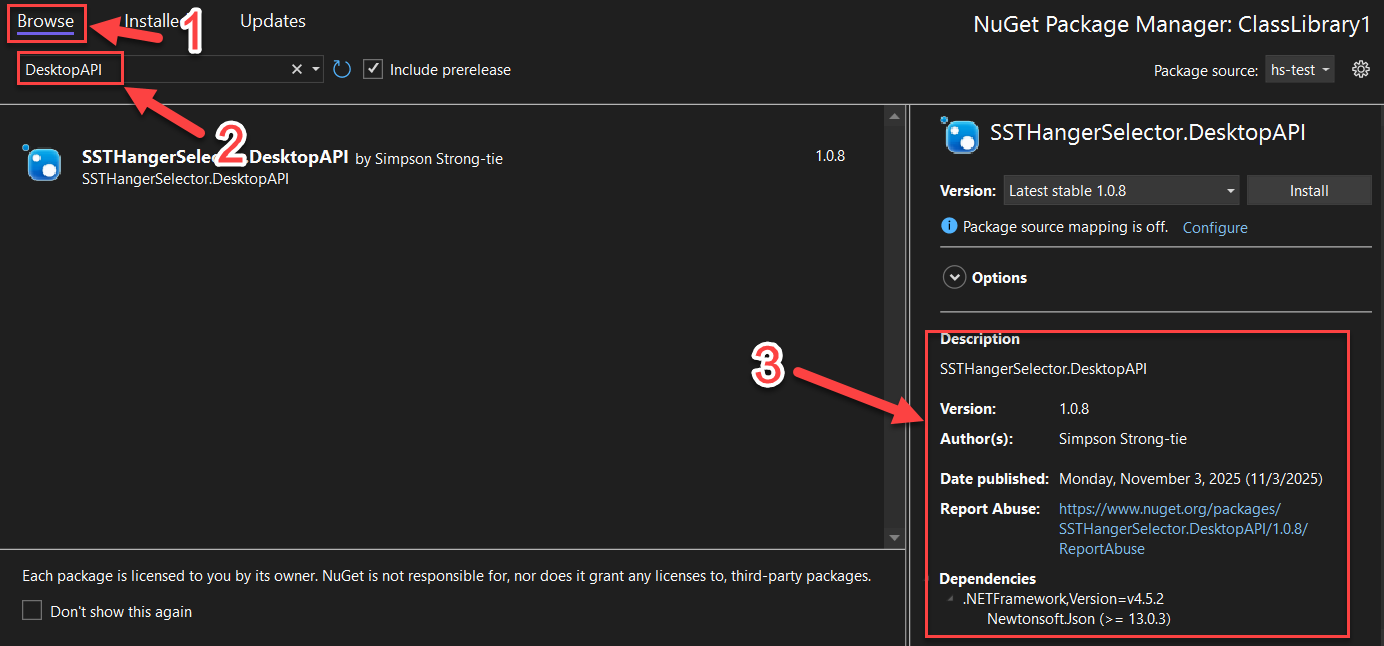
Select the Browse tab to view popular packages from your currently selected source (see Package sources for details).
To search for a specific package, type its name in the search box in the upper-left corner.
- Each package entry may show brief details such as total downloads, author name, or links to the owner's profile—depending on the package source.
Click on a package to open the details pane on the right.
In the details pane, use the Version dropdown to choose which version to install.
- To include prerelease versions in the list, check Include prerelease.
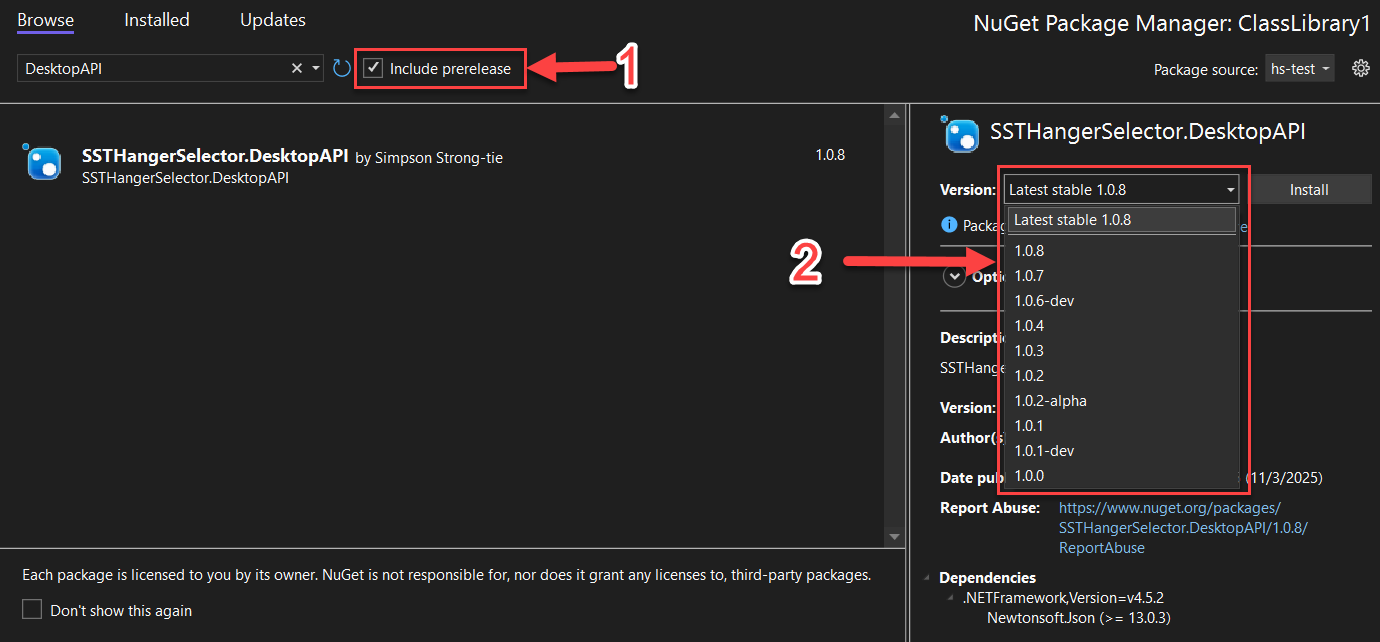
Click Install to add the package.
- Visual Studio might ask you to accept license terms or confirm before installation proceeds.
Once installation finishes, the package and any dependencies are added to your project.
- Installed packages appear under the Installed tab.
- You can also find them in Solution Explorer under Dependencies > Packages.
- You can now reference the package in your code using a
usingstatement.
(Optional) NuGet supports two package management formats: PackageReference and packages.config.
- To set the default format, go to Tools > Options > NuGet Package Manager > General, then select your preferred option under Default package management format.
- For more details, see Choose default package management format.
Open your project in Solution Explorer, then go to Project > Manage NuGet Packages.
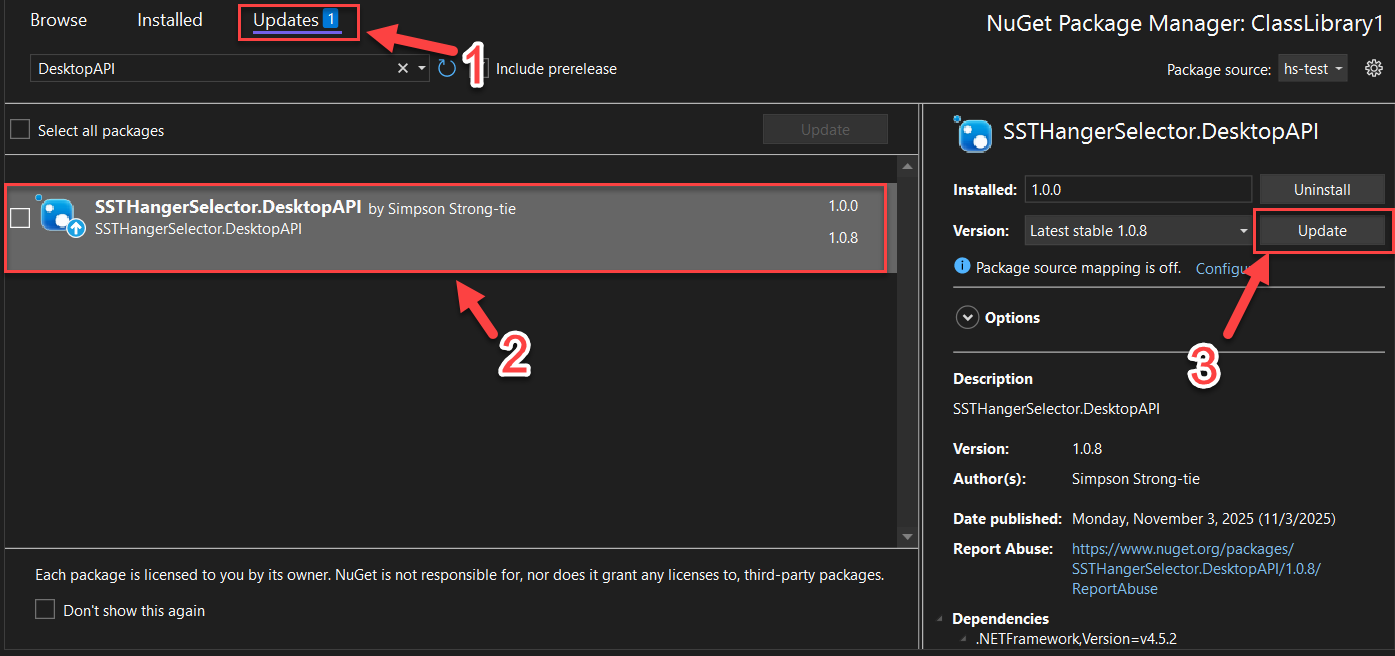
In the NuGet Package Manager window, open the Updates tab.
- This tab lists all packages with newer versions available from the selected package source.
- If you want to see prerelease versions as well, check Include prerelease.
Choose the package you want to update.
In the right-hand pane, select the version you wish to install from the Version dropdown menu, then click Update.
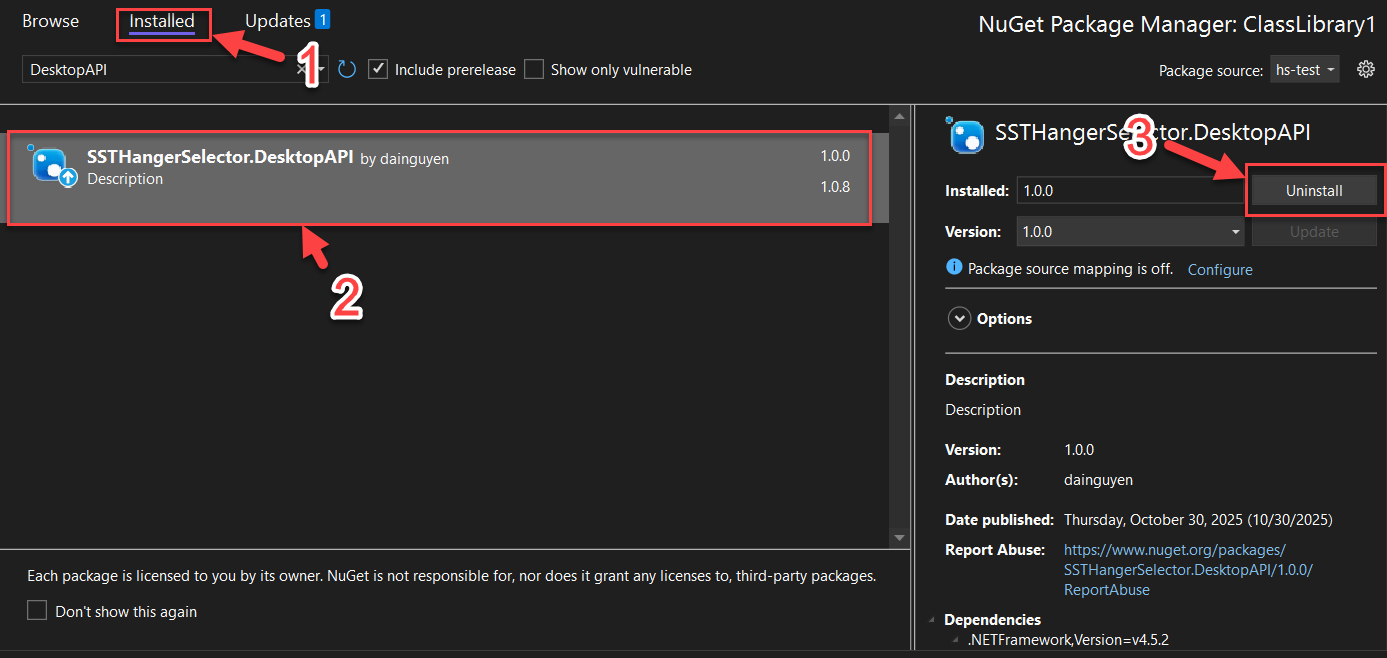
Open your project in Solution Explorer, then go to Project > Manage NuGet Packages.
In the NuGet Package Manager window, switch to the Installed tab.
In the list of installed packages, select the one you want to remove.
- You can use the Search box if you need help locating it.
Once the package is selected, click Uninstall in the right-hand pane.
- Visual Studio will remove the package and its references from your project.